DIY Gather Wooden Sign
If you got a chance to check out my Fall Home Tour this week, you may have noticed a pretty wooden sign in my dining room.
What you may not know is I actually made it myself! It’s been so long since I’ve been able to do something crafty, and I was itching to just buy some supplies and make something. Any creatives out there like me?

This post contains affiliate links for your convenience. For more information, see my disclosures here.
As I was pulling out my fall items to start decorating the house, I felt like I was missing a few things. Mainly larger statement pieces.
I had some small items, but I wanted something that would stand out a little more. That’s when I got the idea for a wooden sign. I knew it would look perfect in our dining room next to the stairs.
This DIY Gather Wooden Sign was so easy to make and literally only took me a few hours to complete. It was exactly the quick crafting project I needed. Here’s how I made my own wooden sign.
DIY Gather Wooden Sign
Materials:
- {2} 1” x 4” Pine Boards
- {1} 0.5” x 2” Pine Board
- Unfinished Wooden Letters
- I found mine at Michael’s
- Handsaw
- Quick Clamps
- Sandpaper
- Tape Measure
- Pencil
- Adjustable Square
- Titebond Wood Glue
- Stain
- I used Minwax Classic Gray
- Paint
- Foam Brush
Step 1: Create a Design
To create the wooden sign, I first came up with a basic design. I wanted the sign to be two board widths wide and have cross section pieces at the top and bottom. The style I was going for was a little rustic, but also finished and modern.

I knew I wanted my sign to be about 5’ tall, so the first thing I did was measure my 2 1×4 pine boards and mark them at 5’ using my adjustable square and a pencil.
Step 2: Cut The Main Pieces
Then, using a handsaw, I cut the boards and sanded the rough edges after each cut.
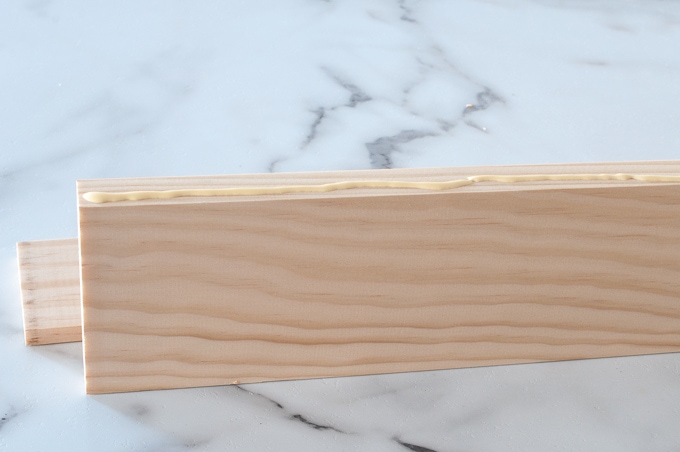
Step 3: Glue the Main Boards
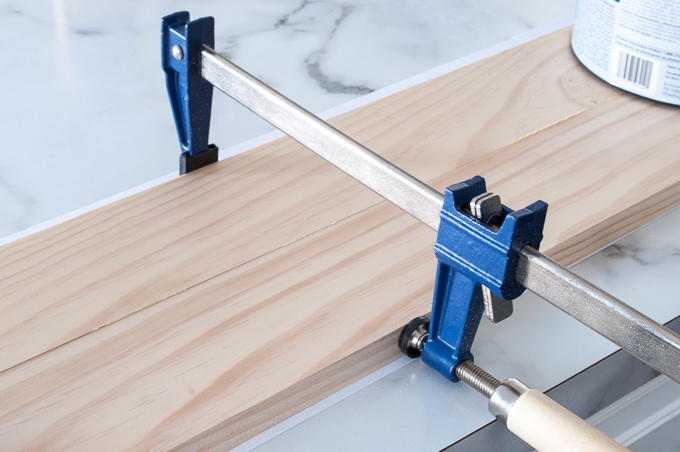
Next, I edge glued the two boards together. I just applied a line of glue along the side of one board and stuck the two together.
Once they were lined up, I used the quick clamps and a few heavy paint cans to hold everything in place as they dried.
I also made sure to wipe off any excess glue that squeezed out of the seam between the boards using a paper towel.
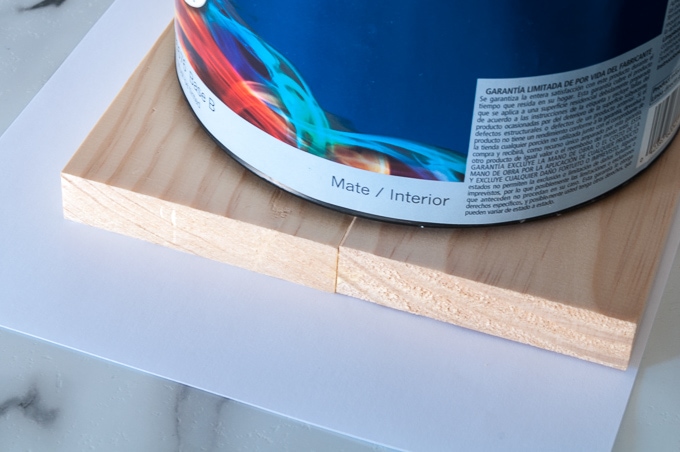
Step 4: Cut The Smaller Pieces
Next, using the handsaw I cut my smaller 0.5” x 2” pine board to create 2 cross section pieces.
I wanted the cross section pieces to be a little bit longer than the width of the main boards so I measured the width of the sign and added ½.” That way the cross section pieces would stick out over the edge of the main boards by ¼” on either side.
Step 5: Glue The Smaller Pieces
I used some wood glue to attach the cross section pieces to the main boards. To position the pieces, I just eyeballed about 4” from the top and bottom of the sign.

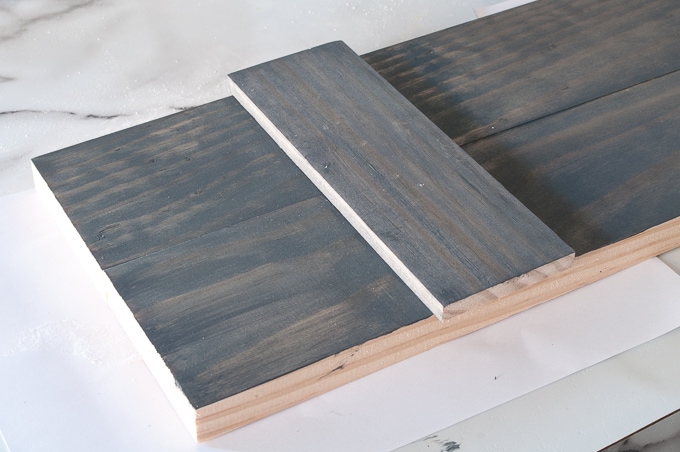
Step 6: Stain the Sign
After the glue was dry and everything was set, I grabbed my stain and applied a single coat to the entire sign.
As someone who can’t get enough gray, I reached for my Minwax stain in Classic Gray.
This stain is a tinted, so it’s kind of a stain and kind of a paint. When you apply it and then wipe it off, it looks like gray paint but you can still see some of the wood grain.
It’s a nice cross between rustic and modern – perfect for my fall sign.
Step 7: Paint the Letters
While the sign dried, I got to work on my letters.
I thought that “Gather” was an appropriate phrase for a dining room since that’s where everyone “gathers” for Thanksgiving.
Autumn, in general, is a great season for connecting with others. After a long summer break with vacations and everyone taking time off, it’s nice to gather together again and catch up with friends.


To paint my unfinished letters, I grabbed a sample that I had laying around of Fusion Mineral Paint in the color Pebble.
I actually have two larger sizes of this because I love the color so much, but the sample was the perfect size for these letters.
Using a foam brush, I applied one coat of the Fusion Mineral Paint to all the letters. Once it dried, all the brush strokes were gone and I had a nice even finish.

If you’ve never heard of Fusion Mineral Paint, you have to try it! It’s my new favorite specialty paint. It’s perfect furniture projects and small crafting projects.
I explained all about why I love this paint in a previous post where I refinished a thrifted cabinet. You can read that post here: The Easiest Way To Update Old Furniture.

Step 8: Add the Letters to the Sign
Once all the letters were painted and dried, I brought them over to the sign and spelled out “Gather.”
I used the tape measure to try and evenly space the letters between the two cross section pieces.
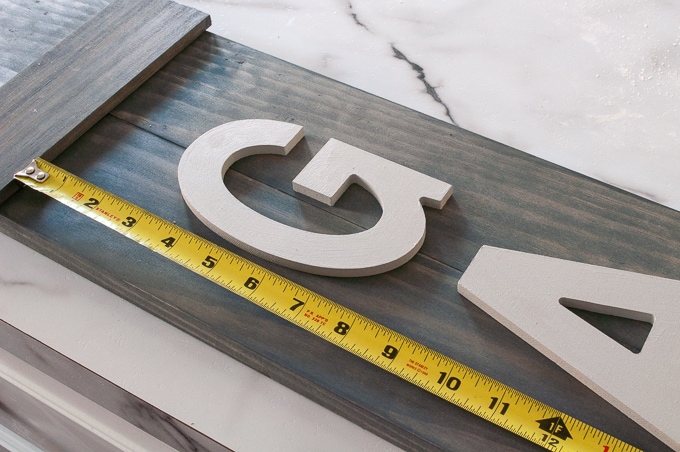
Once I got the spacing right, I used some tape to mark the tops of each letter.


Then, working one letter at a time, I applied wood glue to the back of the letter and placed it on the sign where my tape marking was. I just repeated this process until all my letters were attached.
Step 9: Let the Sign Dry
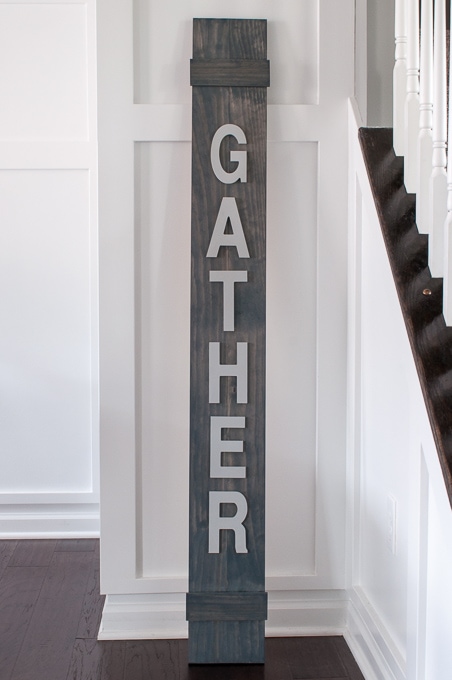
I let the sign dry for a few hours, and then it was done! Super easy and no nails or screws needed. Just wood, paint, and glue.

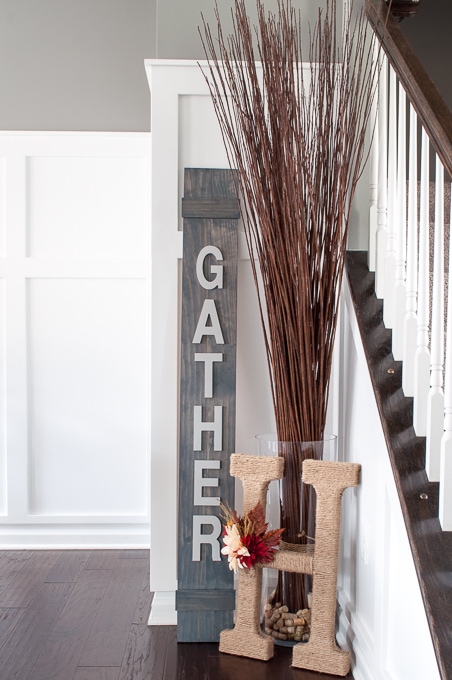
Now I’ve got a brand new custom fall sign for my home. This project turned out exactly as I imagined. I think the wood looks great against the board and batten in our dining room.
Making my own sign was actually a lot easier than I thought. So easy that now I kind of want to make 5 more! Ok, maybe not the exact same one, but I can think of so many different wooden signs I can make.
What do you think? You could easily make one of these signs in an afternoon, and you can customize it with any words. Let me know if you make your own wooden sign. I’d love to see pictures.


This is such a beautiful piece of decor! And the tape strips to align the letters evenly is absolutely genius! Thanks so much for sharing your tutorial with us at Merry Monday this week!
Thanks Marie!
I think it’s my new favorite fall decoration for our home 🙂
Can’t wait to be at the next Merry Monday party
>> Christene