Cricut Explore Essentials: How to Make Your Own Stickers
Welcome back to my Cricut Explore Essentials series!
In this series, I’m showing you how to design your own simple Cricut Explore projects using Cricut Design Space. Along the way, you will learn some of the features of the design software. Today is my last post of the series, by if you missed the first four projects in the series, don’t worry! You can find those tutorials by clicking on the links below:
Cricut Explore Essentials Part 1: How to Make Gorgeous Banners
Cricut Explore Essentials Part 2: How to Make Pretty Organizing Labels
Cricut Explore Essentials Part 3: How to Make Modern Calligraphy Art
Cricut Explore Essentials Part 4: How to Make Custom Etched Glass

This post contains affiliate links. For more information, see my disclosures here.
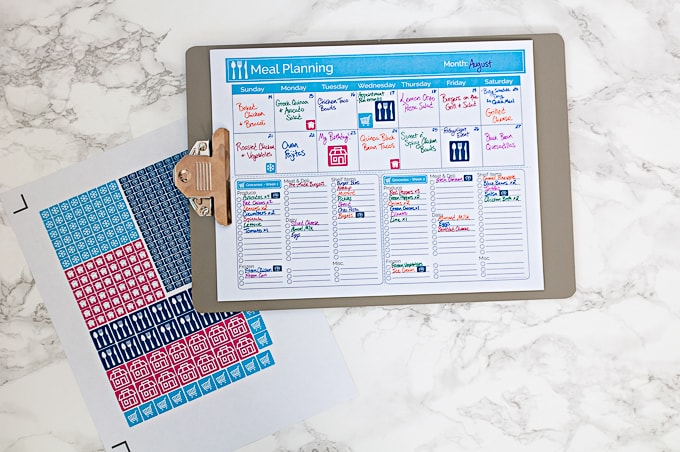
For the last project, I’m going to show you how to make your own stickers! You can use the Cricut Explore to create any kind of sticker, but today I’m going to show you how to cut out my custom meal planning and grocery shopping stickers.
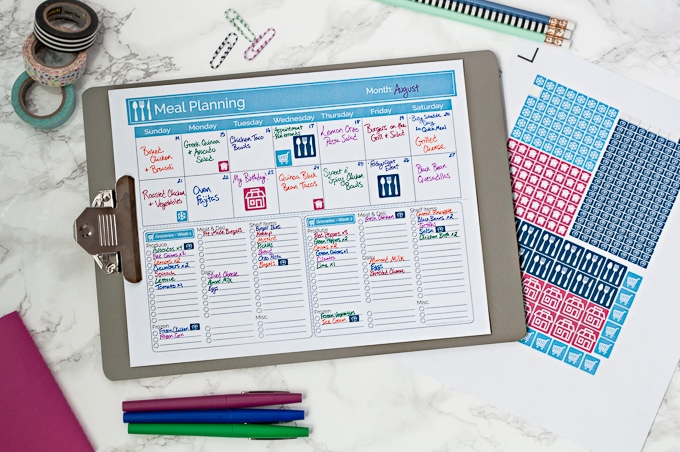
Last week I shared how I organize my meal planning and grocery shopping using my free meal planning printable. If you want to read about the whole process, click here.
This meal planning printable has been a game-changer for me. But, do you know what makes a free printable even better? Free stickers! I designed my own set of custom stickers that work with the printable and help me stay even more organized.
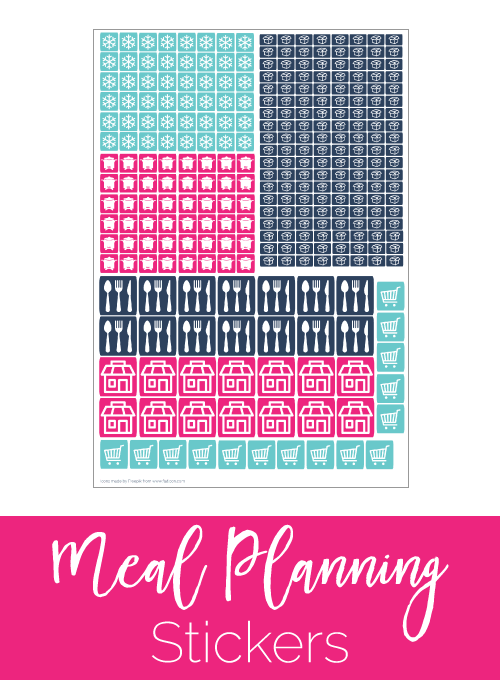
If you’ve already got the free meal planning printable and want your own set of stickers, you can download them now in the resource library.
Get the Free Meal Planning Stickers
Now, I’m going to show you how to use the Cricut to cut out your own set of stickers. Let’s get started!
- Related: Which Cricut Should I Buy?
- Related: Which Cricut Explore Accessories do I Need?
- Related: Crafting Blanks for your Cricut Explore Projects
How to Make Your Own Stickers
Materials:
- Cricut Explore
- Regular Cutting Mat
- Printable Sticker Paper
- Color Printer
- We have the Canon MG3520 – there is also a newer version Canon MG3620
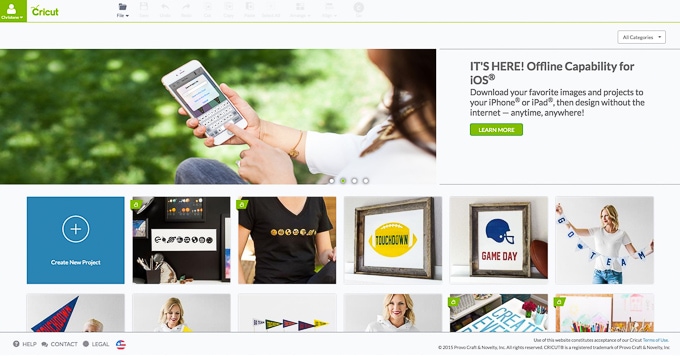
First open the Cricut Design Space by clicking here and selecting “Cricut Design Space” from the top right of the screen. This will open up the Design Space main screen. Click on the first box with the “+” sign that says “Create New Project.” This will open a new blank project for you to work from.
I created these stickers sheet using Adobe Illustrator but you can also create sticker designs on your own in Cricut Design Space.
On the left-hand side of the screen select “Upload Images.” This will bring you to a new menu were you can choose the image you want to upload.
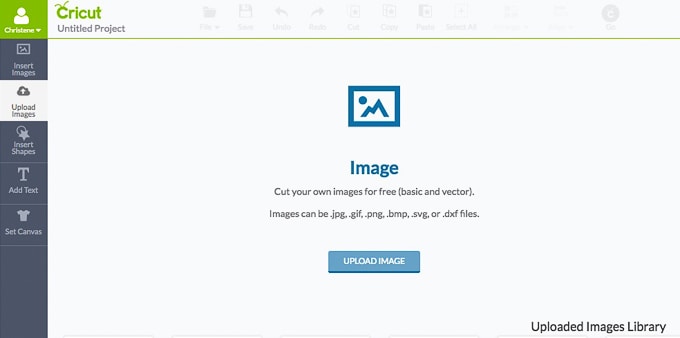
To upload the sticker sheet into design space, select “Upload Image.” Select “Browse” and navigate to the location where you saved the stickers image on your computer. Then select “Open.”
Now that the stickers are loaded into the upload menu, we need to specify what type of image they are. The stickers image has three main colors and is made up of simple shapes. Select “Simple Image” and then select “Continue” at the bottom of the screen.

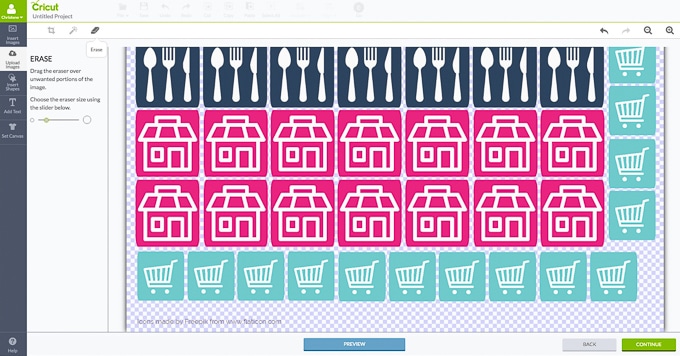
Now we need to identify which parts of the sticker image we want the Cricut to be able to cut. The stickers have a white background and you do not want the Cricut to cut around that background. Instead, you want it to cut around each individual sticker. To make sure the Cricut knows to only cut around each sticker, you will need to remove the background.
With the “Select & Erase” tool (the magic wand), click on a part of the white background and it will disappear and show only the individual stickers.
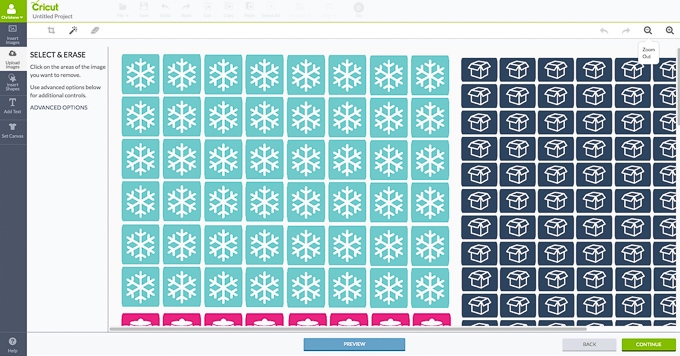
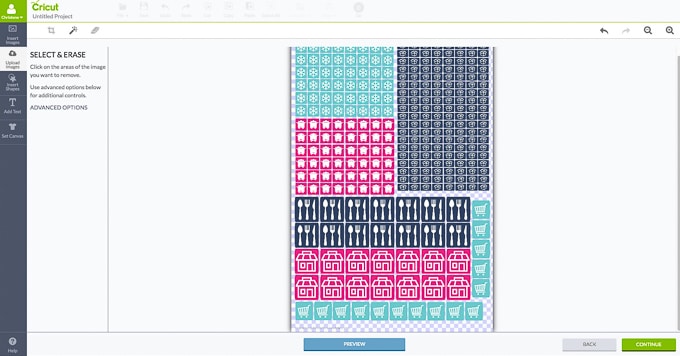
This blue and white checkered background represents transparent parts of your design. Now that all of the white background is removed, you need to remove any unnecessary text from the design. In my stickers image, there is some text at the bottom of the downloadable file. We don’t want to Cricut to cut out that text, so we need to erase it from our image.
Change the “Select & Erase” tool to the erase setting by clicking on the eraser image. Erase the text from the bottom of the image. Once all of the text is gone, you are ready to save this uploaded image. Select “Continue.”

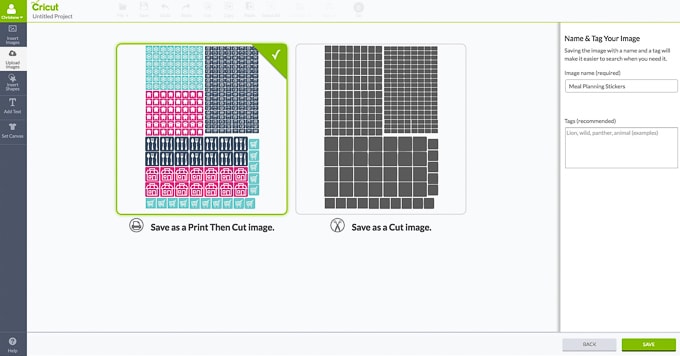
Name the image and select which type of “Design Space image” you would like it to be. There are two options – “Print Then Cut Image” or “Cut Image.” Since this image is going to be printed, save the image as a “Print Then Cut Image.”
Now that the sticker image is saved and ready to use. Select the image and click “Insert Images” to add it to your project.
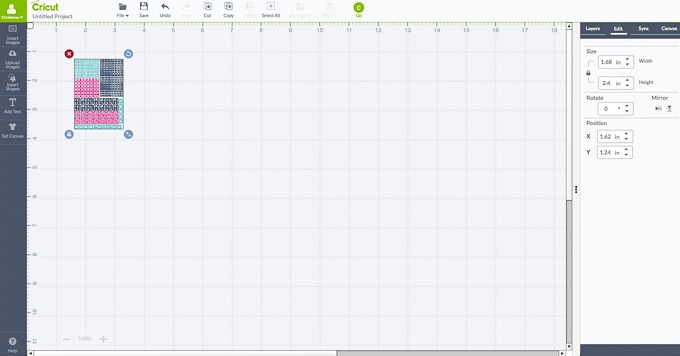

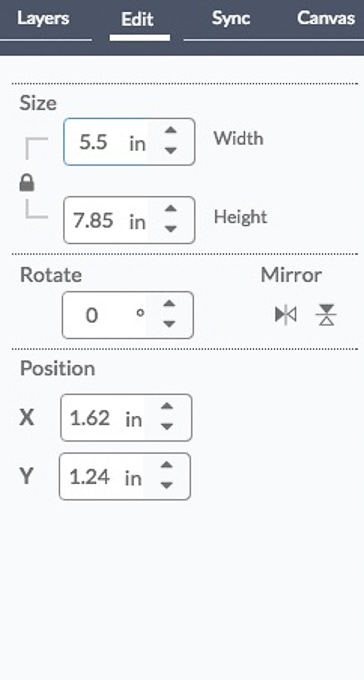
Cricut Design Space doesn’t always retain the original sizing of an image that is uploaded. This image was created to be 5.5” wide. To resize the image, select the image and then, on the right-hand side of the screen, select the “Edit” tab. Change the width to “5.5 in” and the height will scale accordingly.
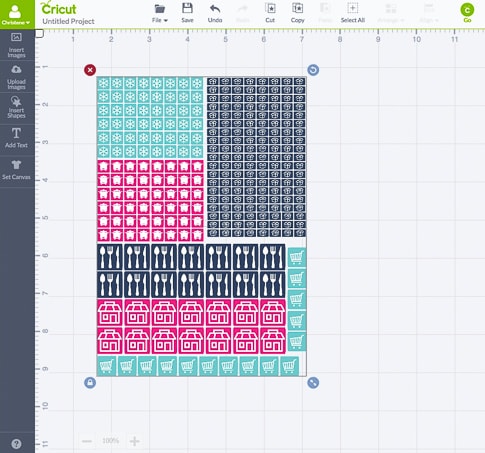
Now we are ready to cut. Select the “Go” button at the top of the screen.
In the top left, under Mat Settings, make sure that the “Bleed” option is unchecked.
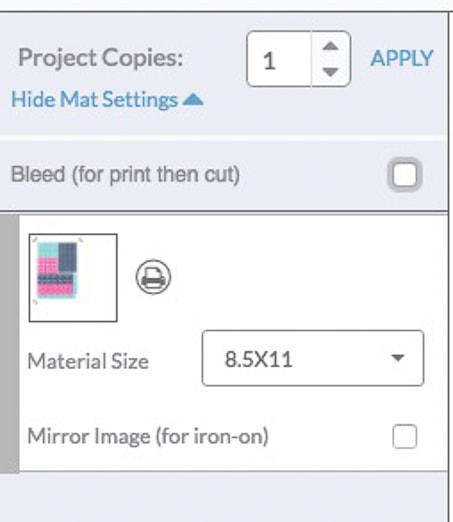
Bleed means that the images will be printed with some of the colors “bleeding” past the cut line. This option is nice for some print then cut projects, but for our stickers we are going to keep this unchecked. Your sticker image should look like this with no image bleed.
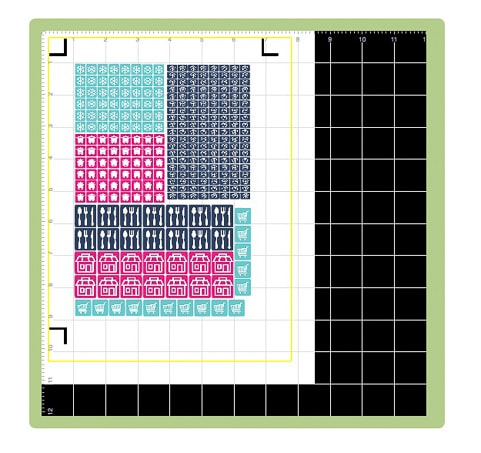
Use your home printer to print the sticker design onto a piece of printable sticker paper. Place the sticker paper onto the cutting mat, load it into the machine, and set the material dial to “Vinyl.”
The custom material setting has an option for “sticker paper” but I have found that vinyl setting works the best. It cuts through the paper but doesn’t cut through the sticker backing, leaving you with a clean full sheet of stickers.
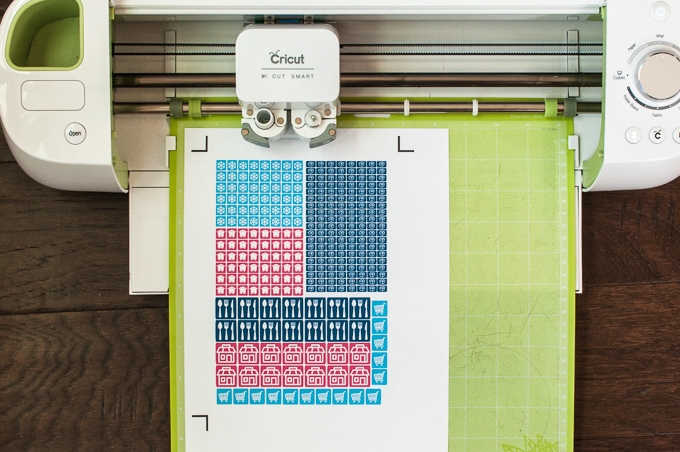
Select “Go” and watch as the Cricut cuts out your stickers. This project takes a long time to cut because of the number of stickers on the page, so you may want to go do something else while the Cricut cuts out the design.
Once the Cricut is finished cutting, peel off the entire sheet from the cutting mat and you have the perfect set of meal planning stickers!
Here’s how I use my stickers with the meal planning and grocery shopping printable.
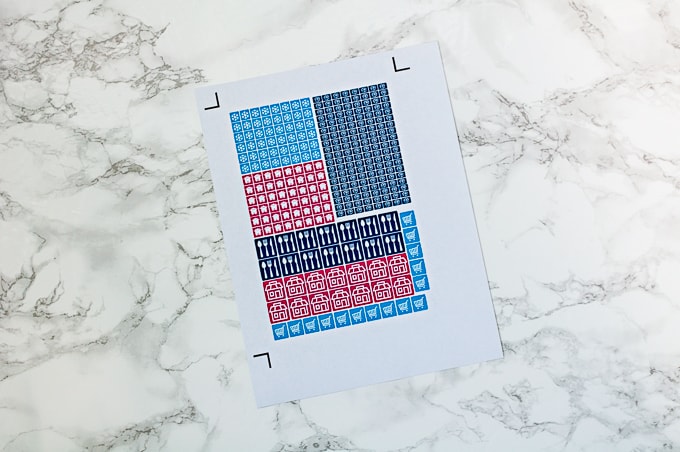
The snowflake sticker lets me know when I need to defrost something. When I put a recipe into my meal planning calendar that requires meat to be defrosted, I just place the sticker on the night before so I remember to grab it out of the freezer.
The slow cooker sticker lets me know that I need to prepare my slow cooker. When I make slow cooker meals, I normally try and put all of the ingredients together the night before. That way I can just throw everything into my slow cooker in the morning, set it, and forget it. When I put a slow cooker recipe into my meal planning calendar, I place the sticker on the night before so I remember to prepare all my ingredients.
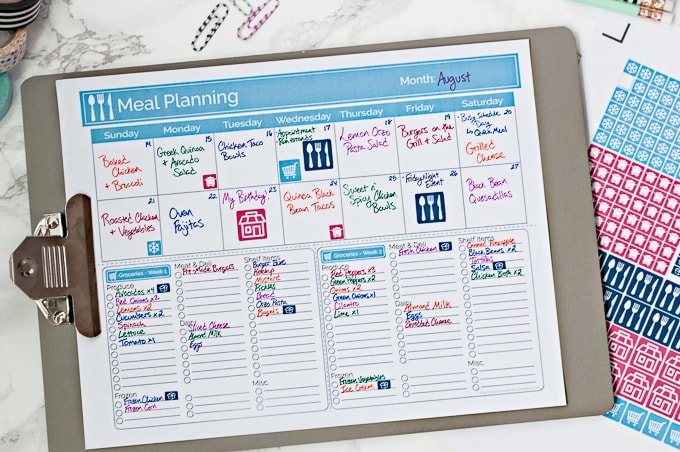
The silverware sticker is for nights when we are going to eat leftovers. The restaurant sticker is for nights when we are going to go out to eat. Instead of writing out “leftovers” or “go out” on the calendar for these events, I place the sticker on that day. It helps the day stand out on my calendar so I know I won’t be cooking that night.
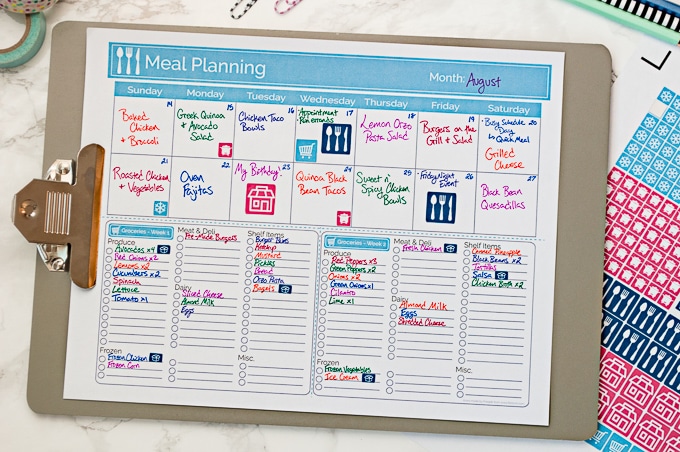
The grocery cart sticker is for planning which day I’ll be going grocery shopping. This sticker can be used in both my meal planning calendar and my planner to show which day I need to run out to the store.
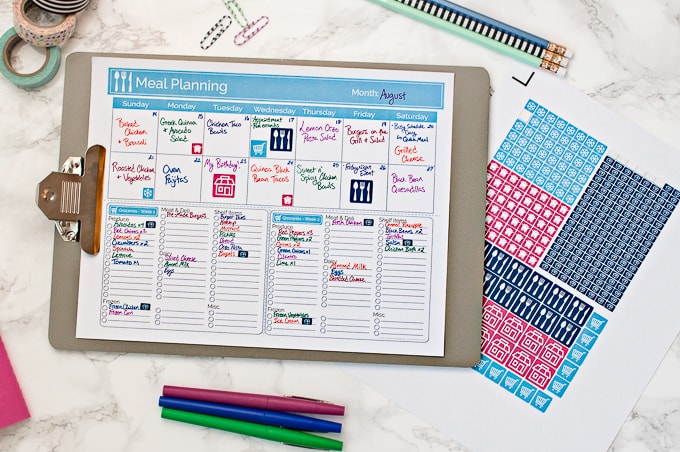
Finally, all the little box stickers are for grocery list items that I need to buy at a “big box store.” My big box store of choice here in Pennsylvania is Costco. Costco has a ton of grocery items that are a much better deal than our normal grocery store. When I’m making my grocery list and I write out an item that I know I’m going to buy at Costco, I place a box sticker next to it. That way the items stand out on my list and I know when I’m at a regular grocery store to skip those items and pick them up later at Costco.
I hope that you enjoyed this final tutorial and that it inspires you to try out more projects using your Cricut Explore cutting machine.
If you have any Cricut questions I would be happy to try and help you out. Leave your questions in the comments below!
Cricut Explore Essentials Part 1: How to Make Gorgeous Banners
Cricut Explore Essentials Part 2: How to Make Pretty Organizing Labels
Cricut Explore Essentials Part 3: How to Make Modern Calligraphy Art
Cricut Explore Essentials Part 4: How to Make Custom Etched Glass
Cricut Explore Essentials Part 5: How to Make Your Own Stickers (You’re here!)


I love this! I can’t wait to try it. What kind of printer are you using? I haven’t found a color printer that I love yet.
Hey Susie!
We actually have a really inexpensive printer that we have been using. We bought it because we wanted something that wouldn’t break the bank AND could print wirelessly. We actually use the Canon MG3520 and really like it. They also have a newer model called the Canon MG3620. I’m not a printer expert but I’ve been happy with this printer.
>> Christene
Thank you so much for sharing! I have been trying to use my Cricut for Stickers lately, but I just can’t seem to get the coloring right., I’m starting to think the issue is my printer. What have you used that you would recommend? (Or recommend to stay away from?)
Hi Lee! I am no expert on printers, but we have a Canon MG3520. It’s been working great for us! We bought it because it was a great price and also we wanted wireless printing capabilities. There is also a newer model called the Canon MG3620 (they updated since we bought ours).
As far as colors go for stickers, I find that making stickers at home can be a little different than what you expect stickers to be. Most store bought stickers are glossy, which isn’t really something you can achieve with an at-home printer. The sticker paper that I linked to in the post is a matte finish so that the ink doesn’t smear. I am happy with the coloring, but it’s definitely not a glossy bright finish like a real sticker would be.
One thing that I find helpful is making sure your sticker colors are more vibrant and rich when you are designing them. I’ve tried making lighter color/ pastel stickers before and they just never come out right. So I have been sticking to creating more “saturated” stickers.
Hope this helps!
>> Christene
I am thinking about purchasing a Cricut Explore Air 2. I would be using it to design my own invitations and things. I am wondering if the Cricut would cut out my uploaded image cleanly When you use the erase tool to get rid of the white background, do you just click once on the background or do you have to erase it completely by using the erase tool like an eraser and get every little spot?
Hi Allyson!
The Air 2 would be a great tool for making and cutting out your own invitations!
When you upload an image, as long as there is good contrast between the background and your image, you will be able to click once on the white background and the software will remove it. If there is not very much contrast, and the image is complicated or grainy, the software will have a harder time figuring out what is the background and what isn’t. That’s a situation where you would need to erase by hand.
The magic eraser tool is the one that I use the most when I upload designs. When you click on a color to remove, it will remove the entire area in one click.
If you want, you can try out the software before you actually buy a machine. Just go to https://us.cricut.com/design/#/landing to get to the Design Space software. You can sign up for an account even without having a machine yet. You can also upload images and design all with the free account. You just won’t be able to cut anything out.
I hope that this helps! Can’t wait to see what you create with your new Cricut!
>> Christene
Christene, Thanks for the quick reply. I love the tutorials step by step. Just what I need. I will try the software to see how it works. I can’t wait to get my Cricut.
Allyson
Thank you so much for your tip to cut on the vinyl setting! I was pulling my hair out with frustration when the sticker setting cut too deep and the Washi setting didn’t cut deep enough. Much gratitude!